Citizen Lash
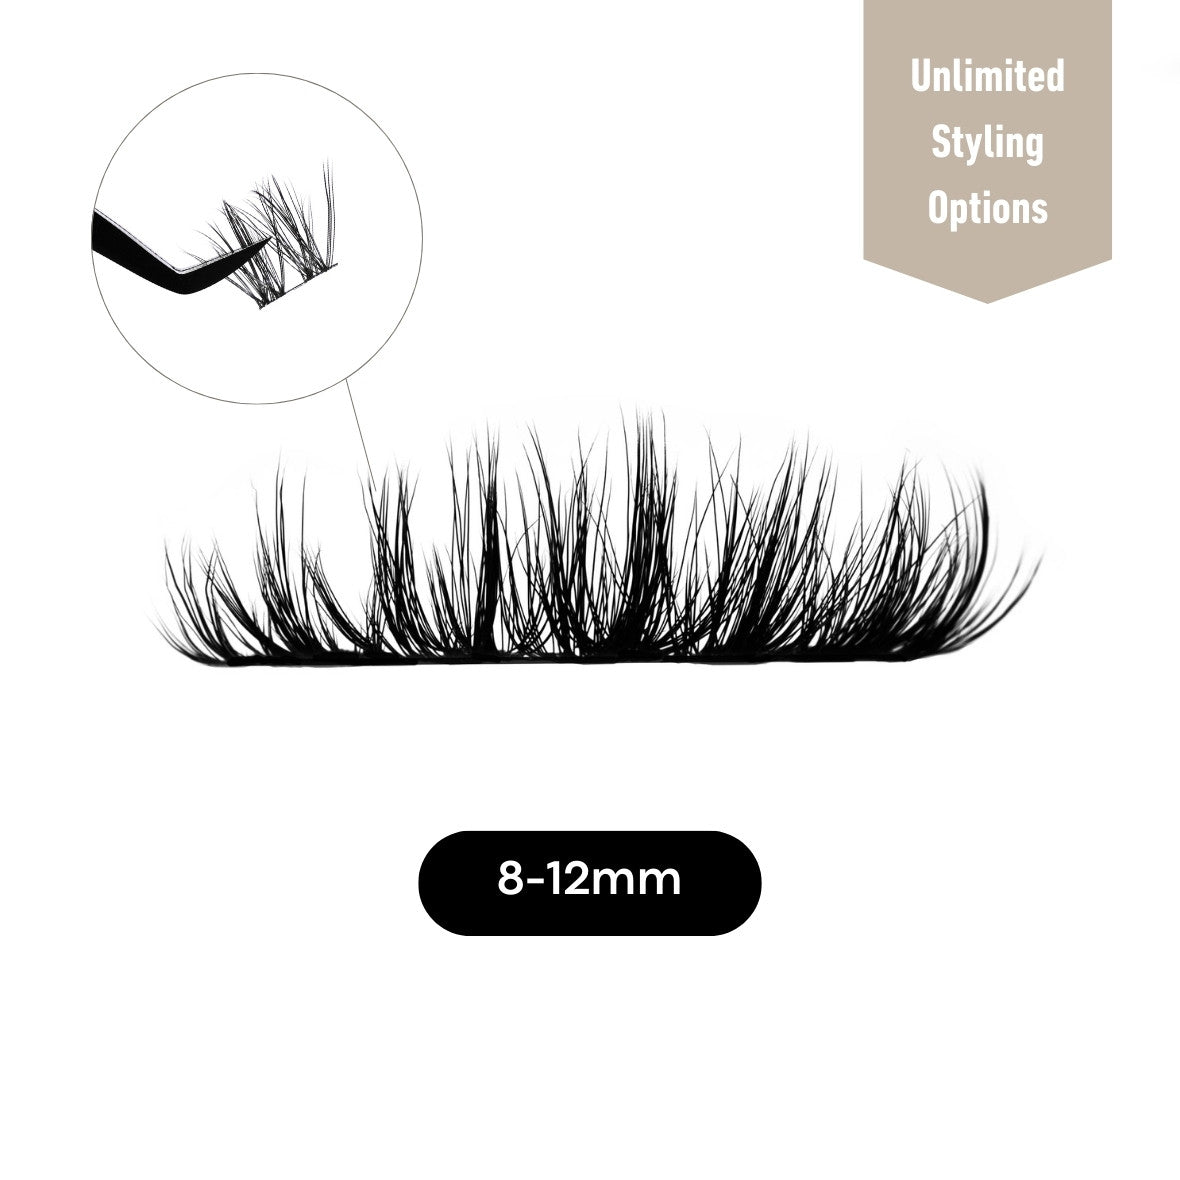
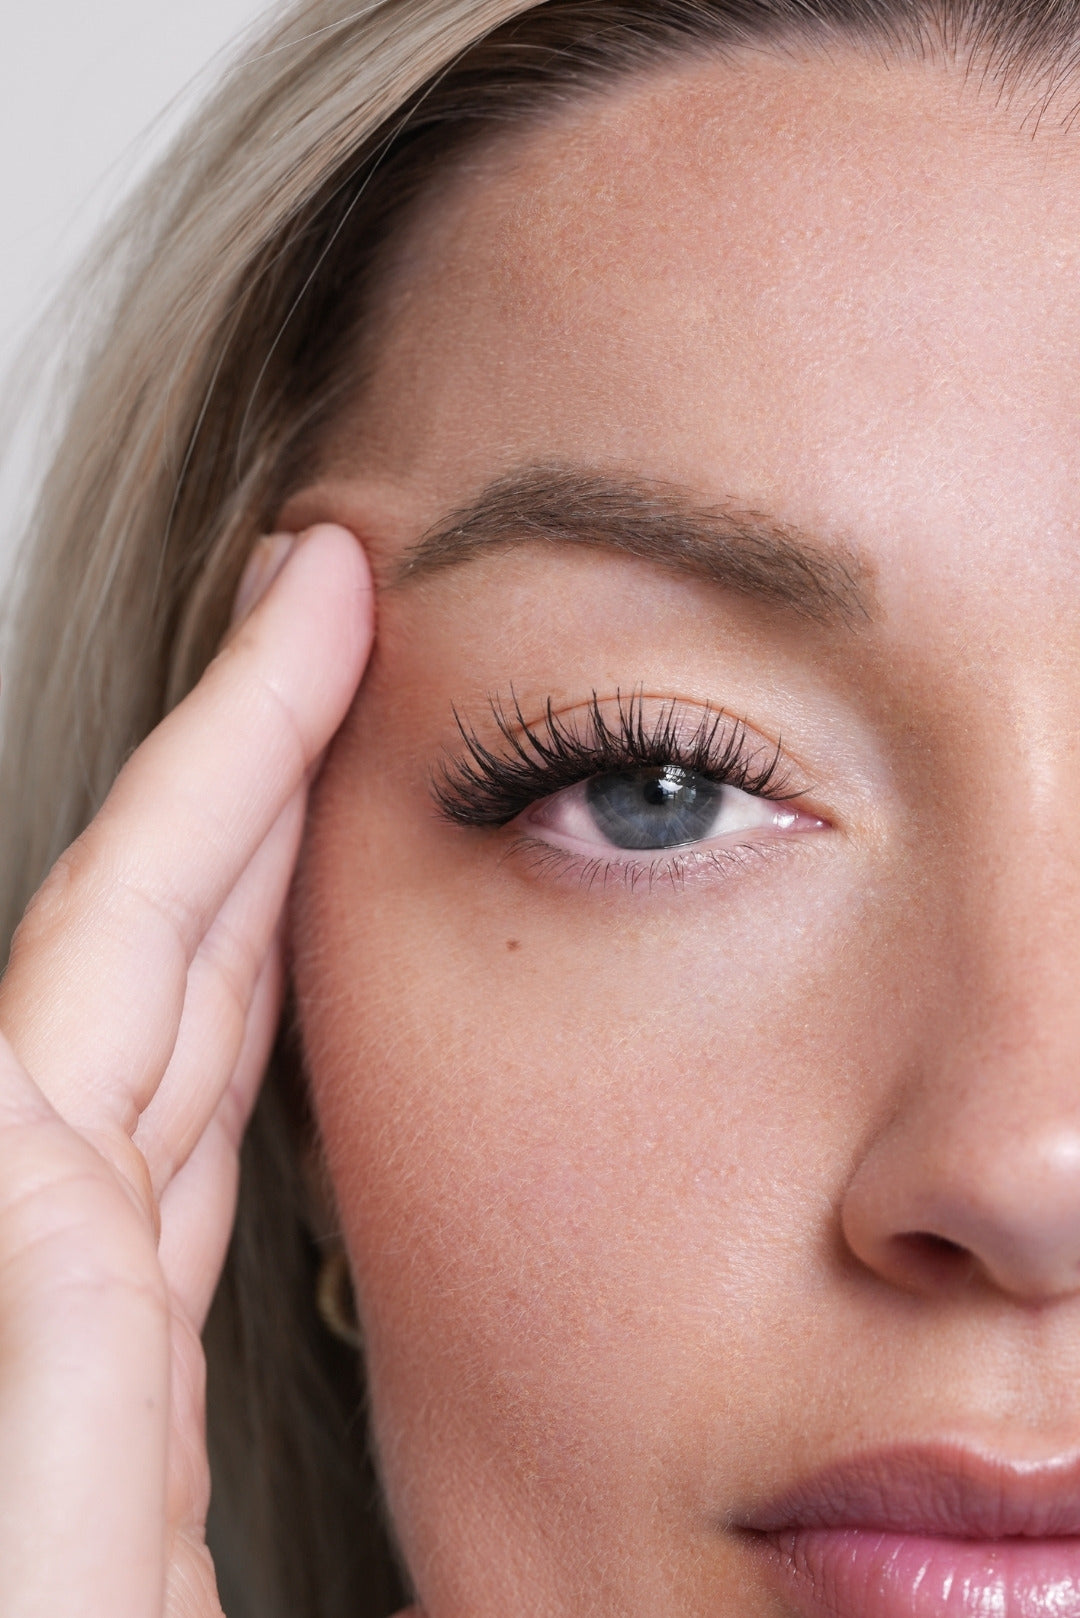
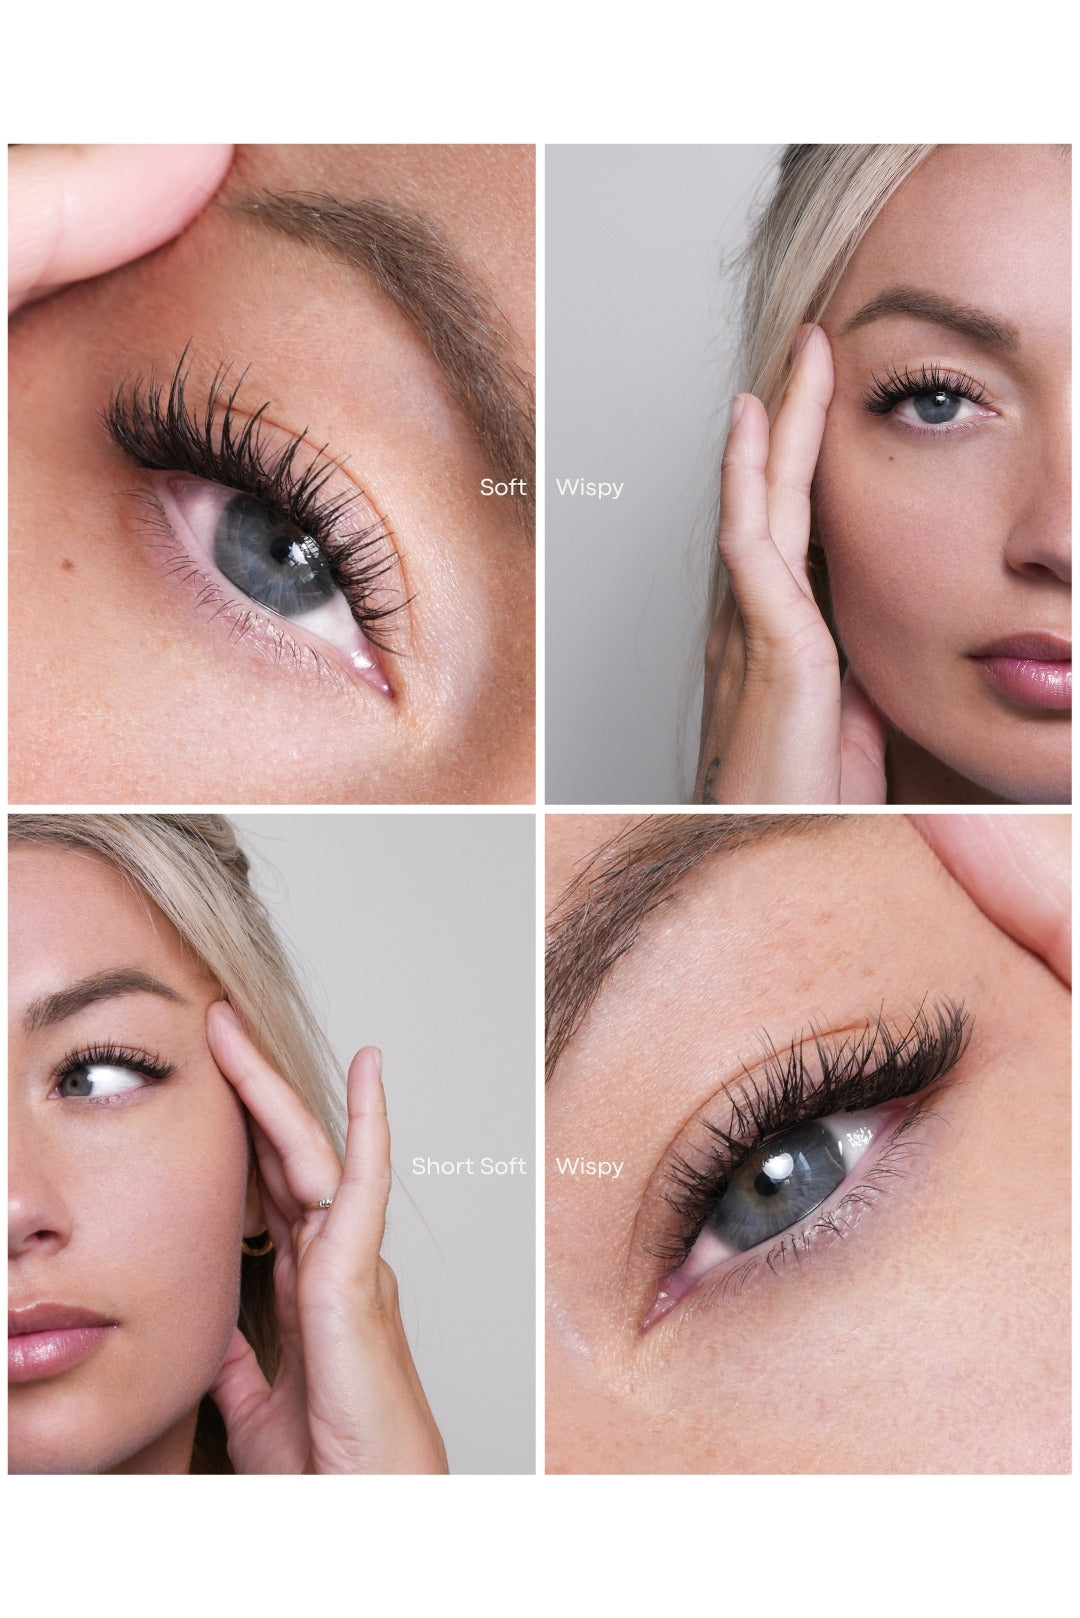
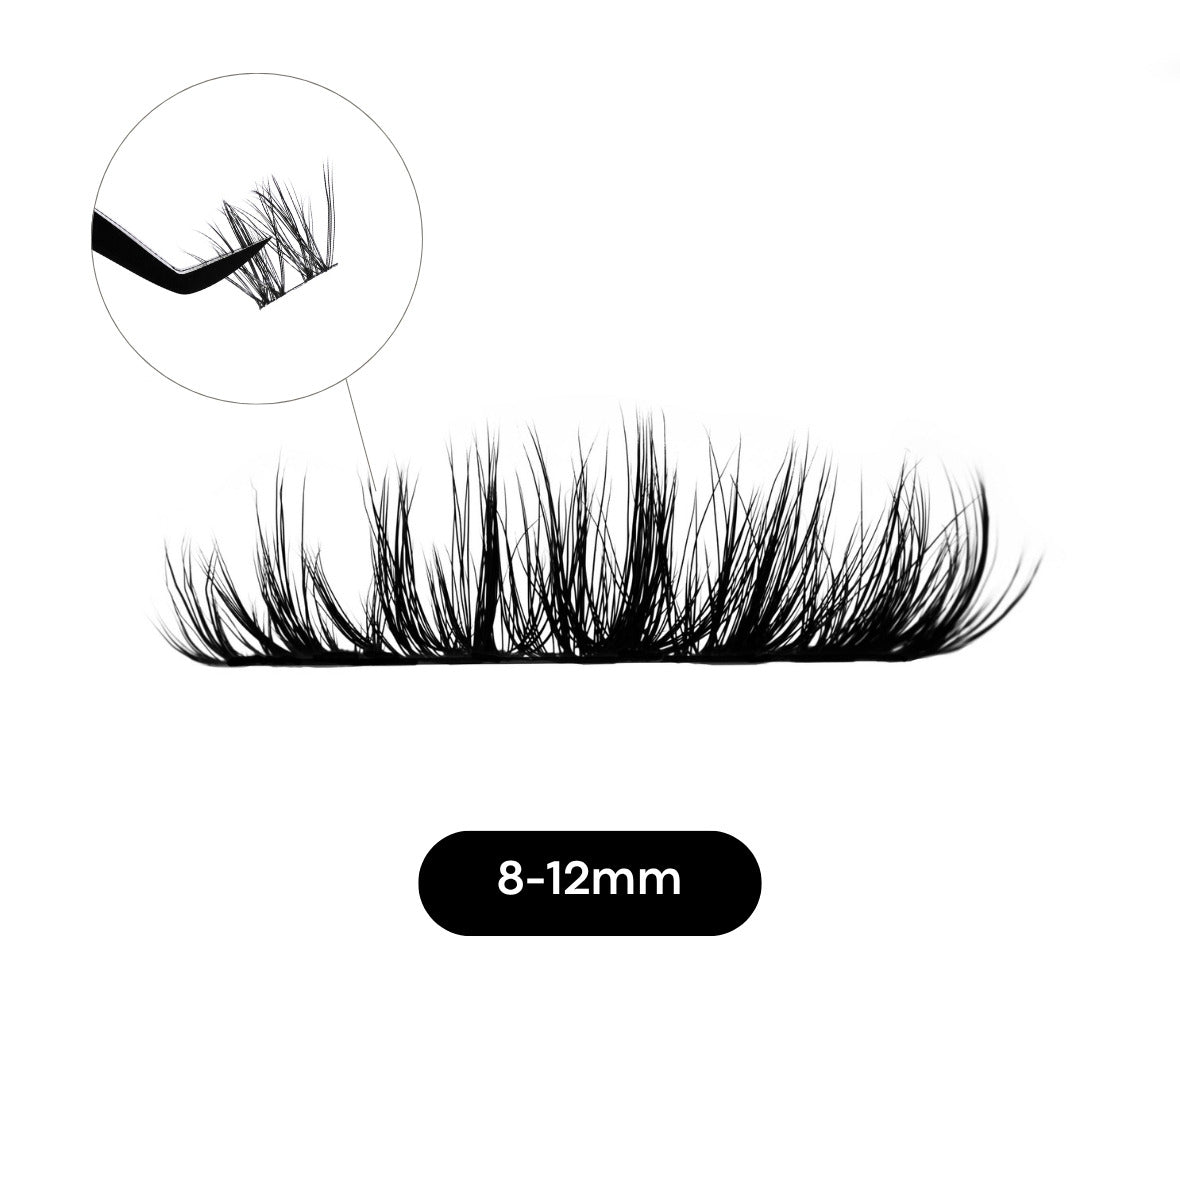
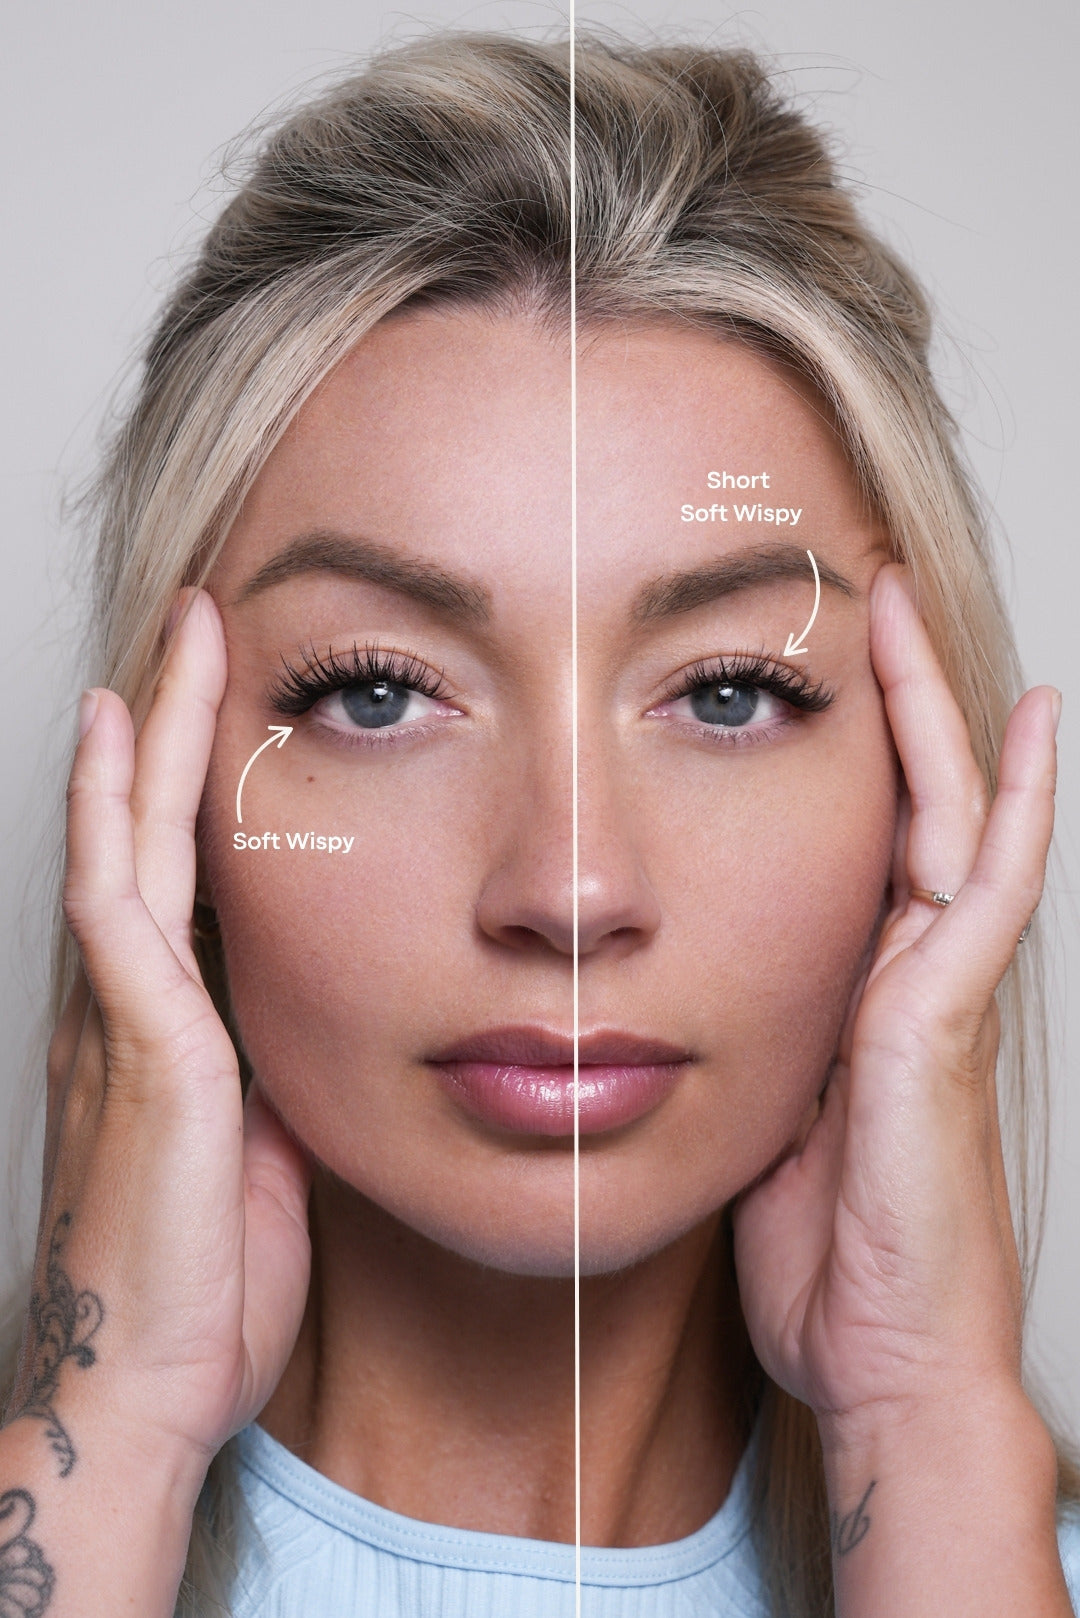
SHORT Soft Wispy
Our #1 Best Seller — Now Available in Short Lengths. Perfect Everyday Lashes.
SHORT Soft Wispy
A 10109 McDonald Park Road Sidney
10109 McDonald Park Road
Sidney BC V8L 5X5
Canada
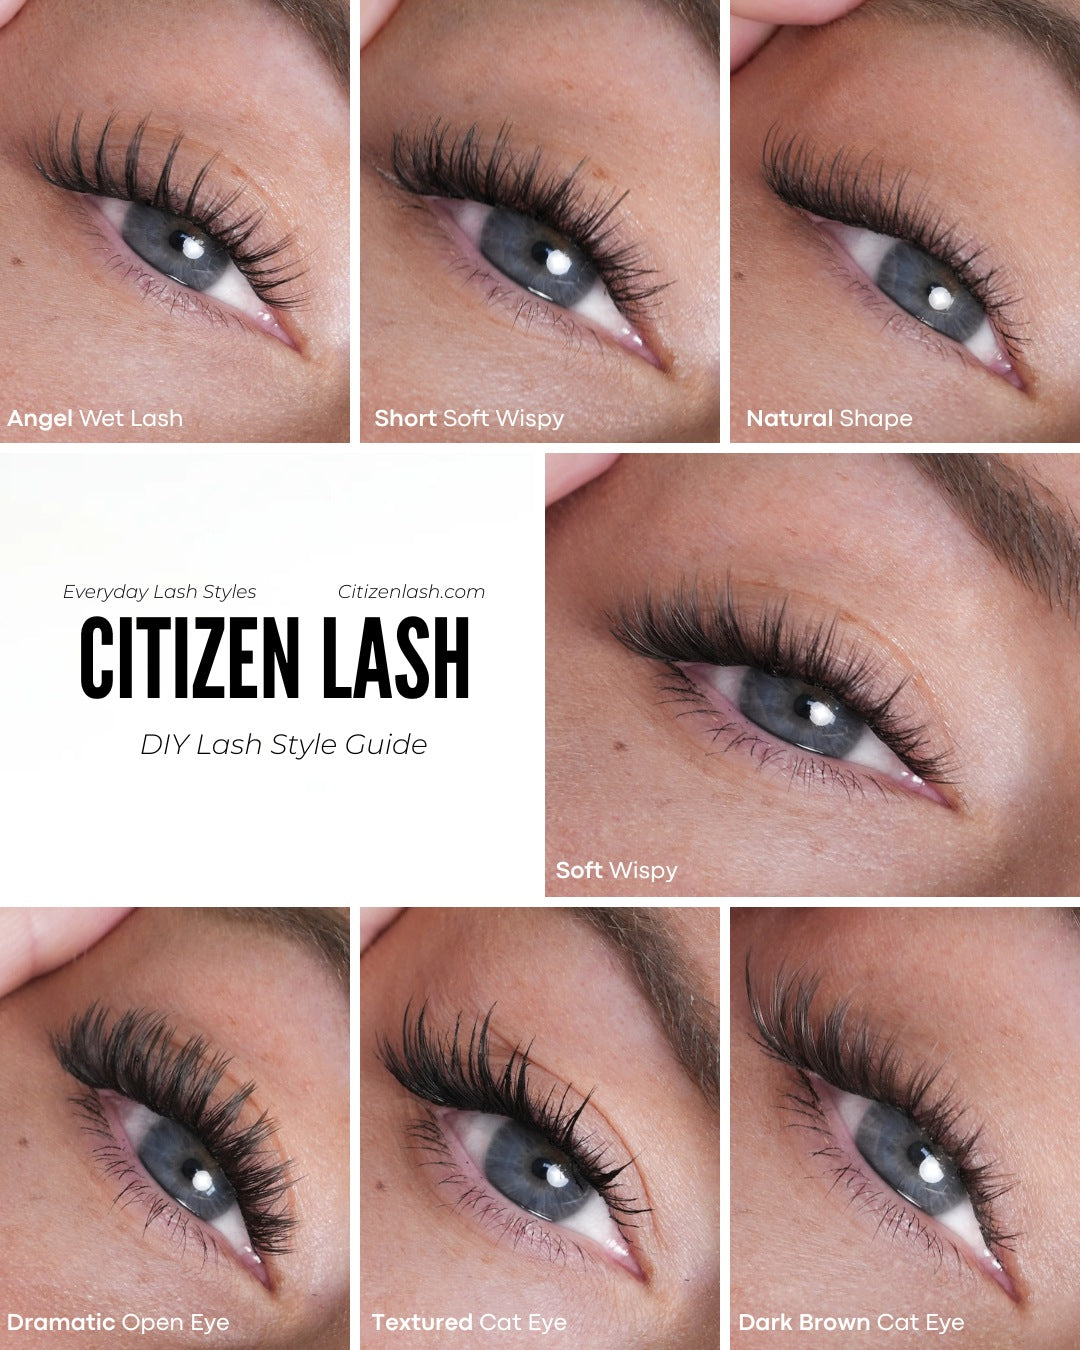
Soft Wispy is our top-rated lash style for a reason. These are your go-to, everyday DIY lashes that never disappoint. Crafted with the perfect balance of density and length, this style flatters just about every lash lover—whether you're a minimalist or like a bit more drama. The ultra-light lash fibres and weightless band make them feel virtually undetectable, and their airy design makes stacking or overlapping for added drama a breeze.
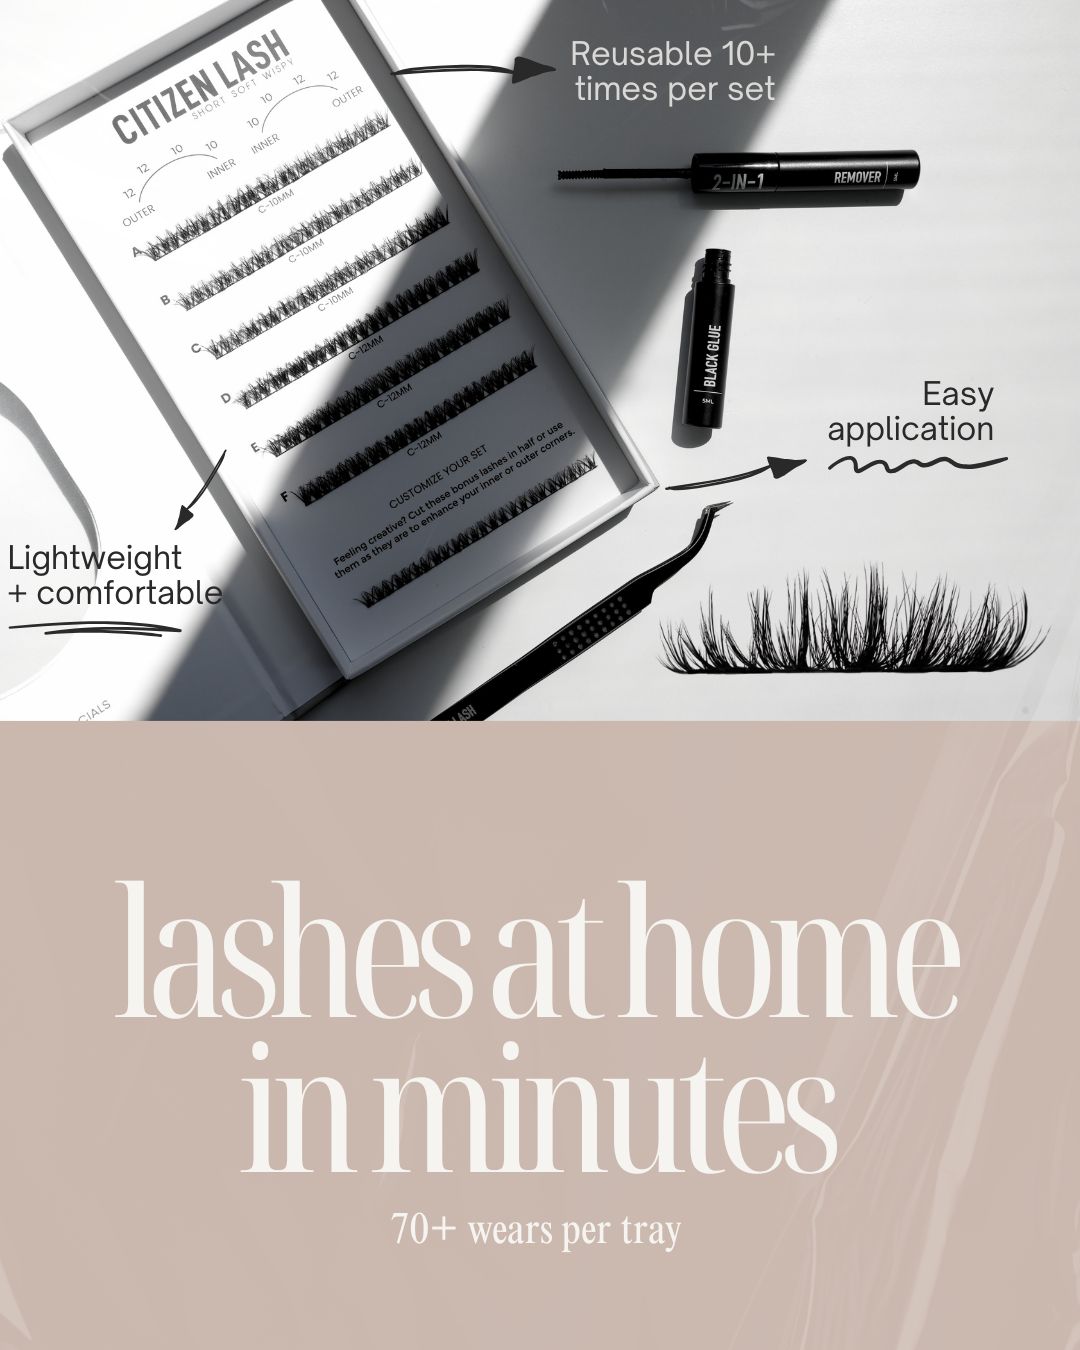
DIY eyelash extensions (also known as temporary lashes, semi-permanent lashes, or false lashes) are individual lash clusters applied one by one to the top or underside of your natural lash line using a semi-permanent adhesive. With the Citizen Lash DIY system, you can create longer, fuller-looking lashes that last up to 5 days per wear—with each set reusable over 10 times.
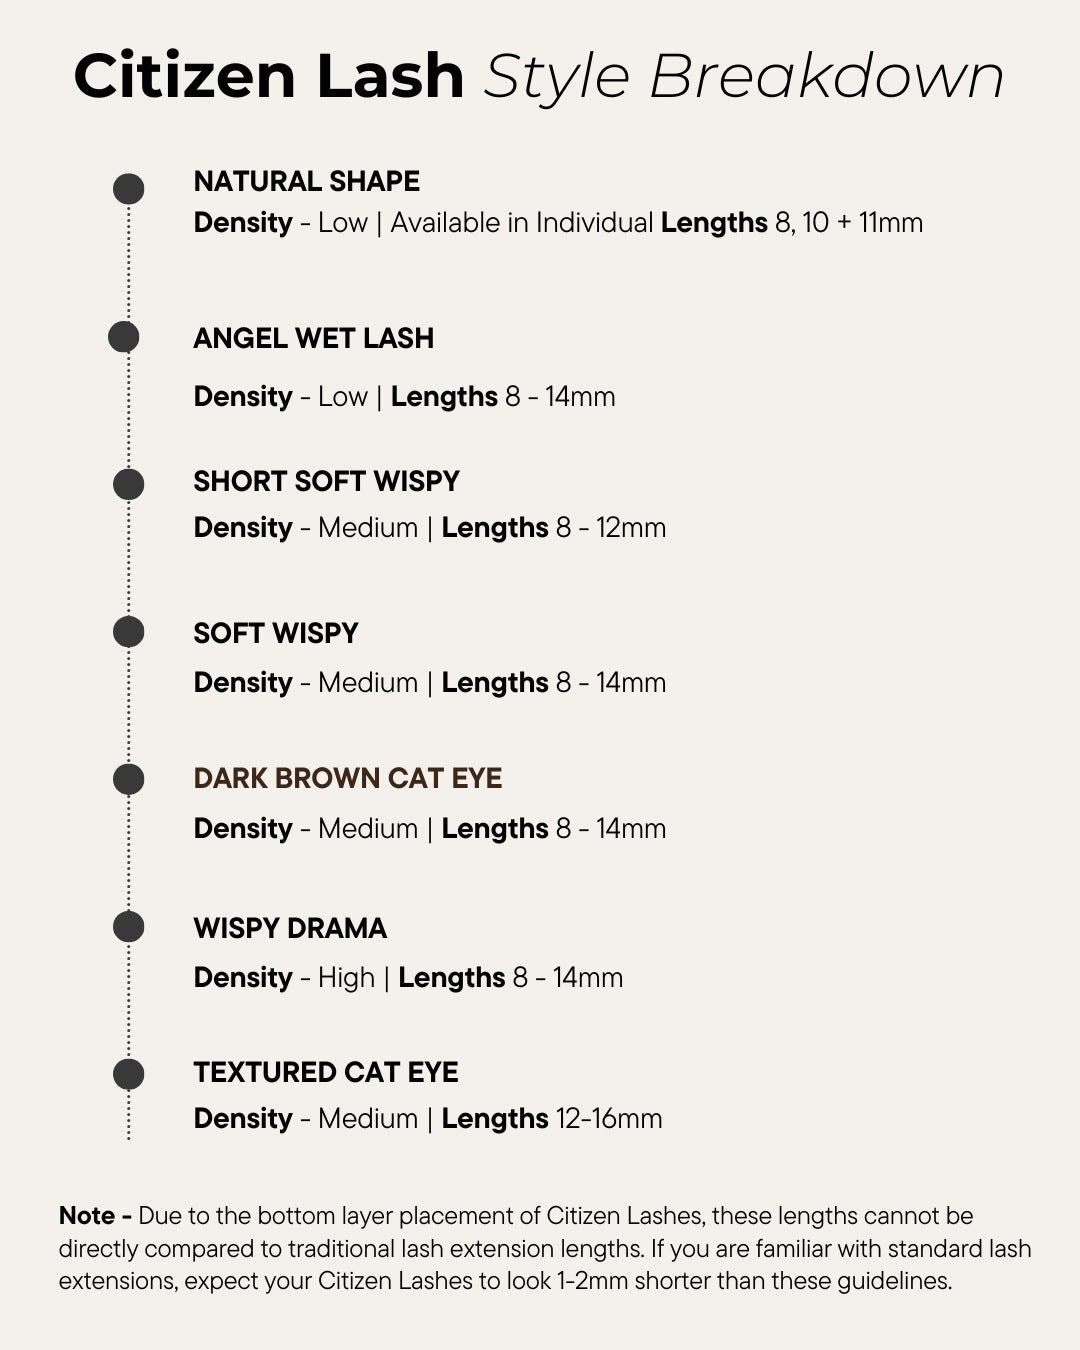
Now available in two length options:
-
Regular Soft Wispy: 8–14mm for a classic, higher-impact look
-
Short Soft Wispy: 8–12mm for a shorter, softer, more natural effect
Product Highlights:
-
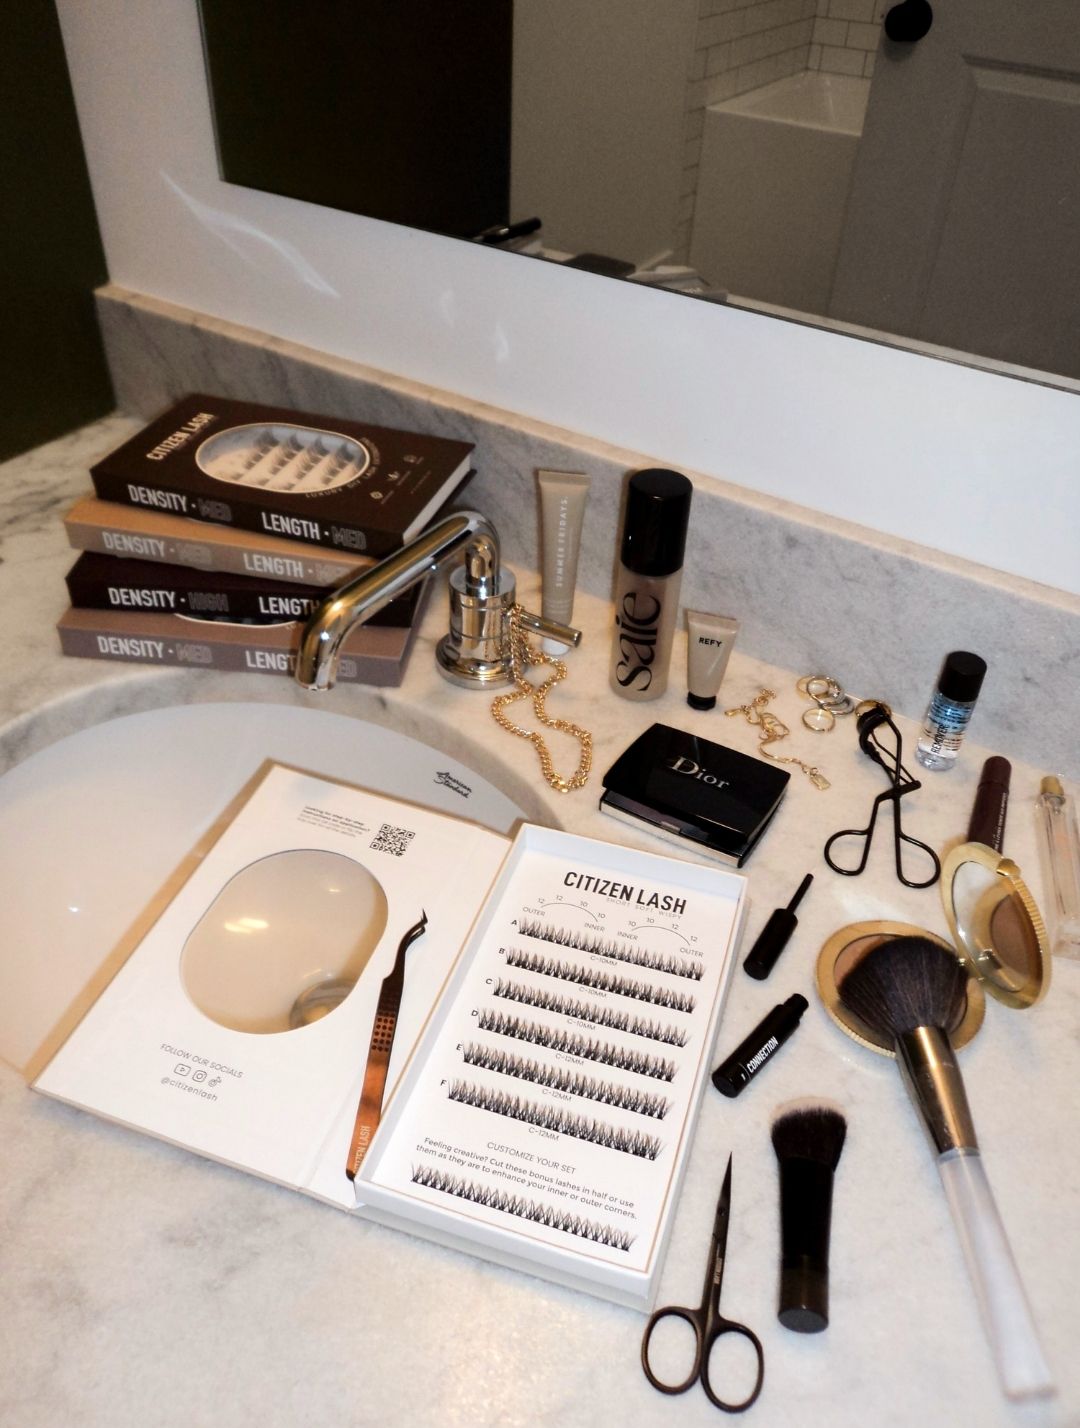
Density: Medium | Length: Short–Medium (choose Regular or Short)
-
Includes 6+ full sets per tray + 1 bonus set of Minis
-
Minis add extra versatility—perfect to enhance the inner or outer corners
-
Stack lashes for volume using the sandwich technique (double up the set)
-
Flexible, comfortable band for top or under-lash placement
-
Vegan, cruelty-free, and eco-friendly packaging
-
Each tray offers 60+ wears with proper care (as little as $0.66 per wear)
-
Can be worn for multiple days; however, nightly removal is recommended for optimal hygiene
-
Beginner-friendly and easy to apply—even if you're brand new to DIY lashes
Whether you're just starting out or you're a total DIY lash pro, Soft Wispy gives you that flexible, customizable lash look in just minutes.
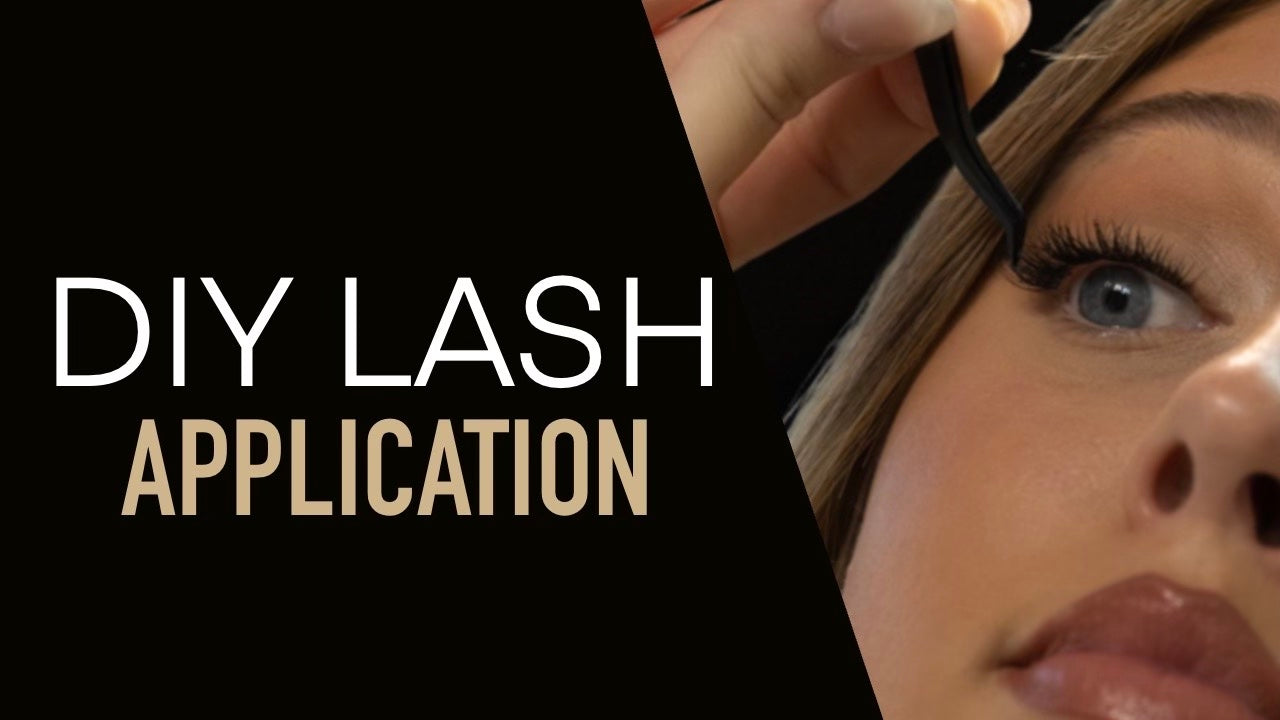
1. Multi-Day Wear:
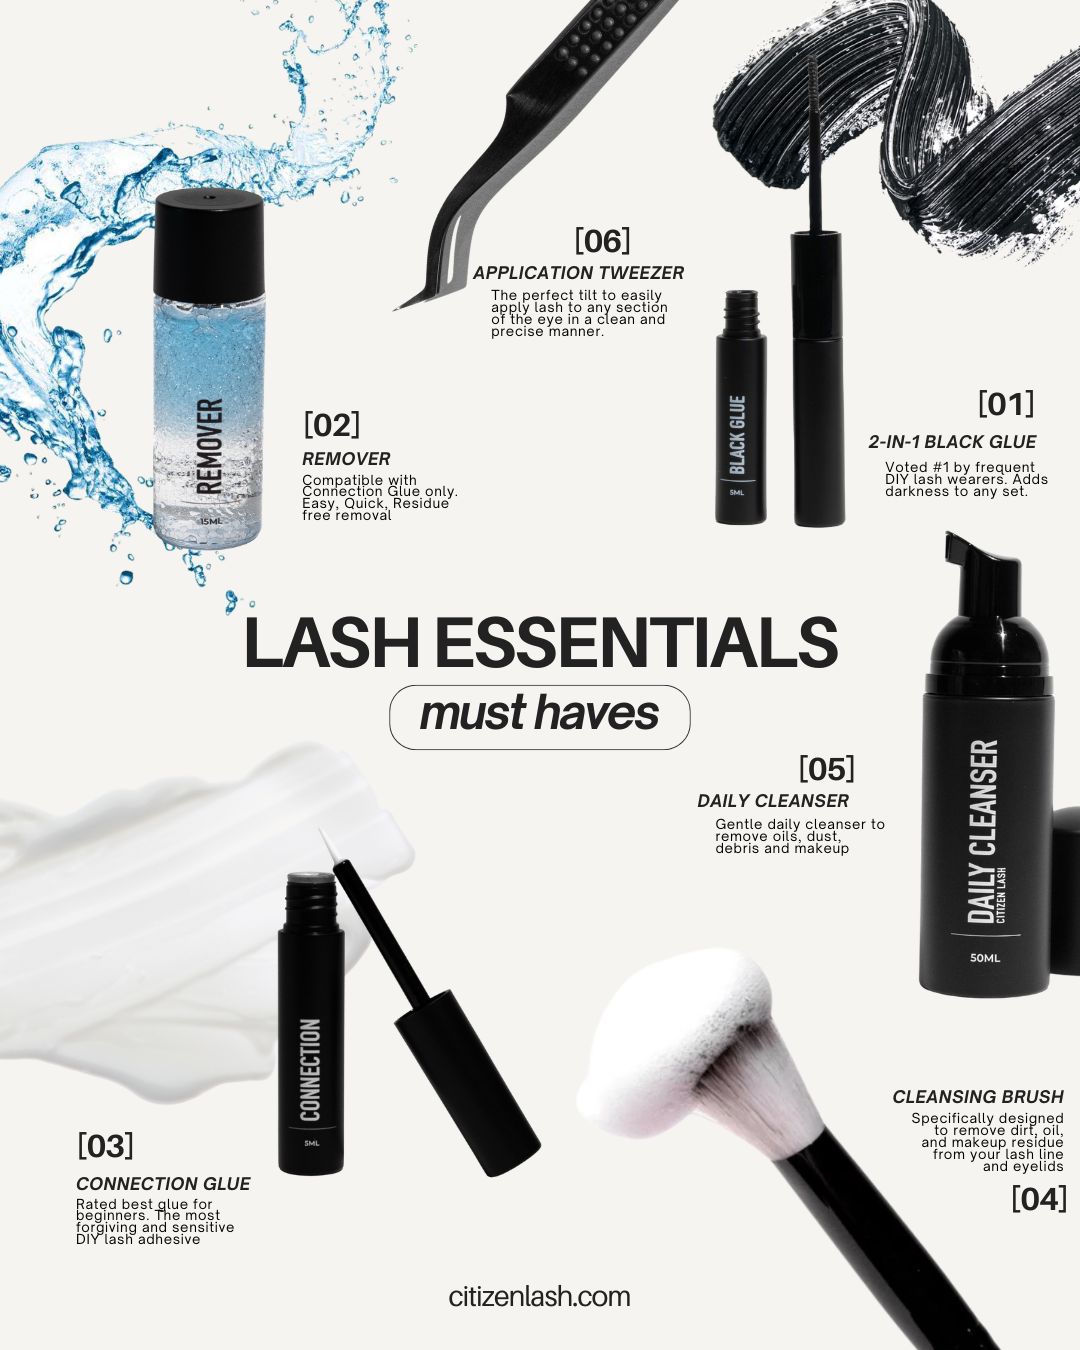
Prep your natural lashes for a long lasting hold.
Use Daily Cleanser to remove oils, debris and makeup from the eye area. Rinse and dry.
One Day Wear:
We recommend applying a coat of mascara to your natural lashes before applying extensions to promote easier removal.
2. Apply adhesive
While the fan you intend to apply is still in the tray, lightly coat the entire exposed base with adhesive. We suggest starting on the inner or outer corner, working towards the opposite corner.
3. Pick up the fan
Sandwich the fan between the tweezer tips. Use pressure to grip the fan and gently lift it off the strip.
4. Prepare for placement
The goal is to line the fan up perfectly with your waterline. In order to get the proper angle for placement, you may have to adjust the fan within your tweezers. There is no right or wrong placement technique, but some people find it helpful to grip just the tips of the fan in order to easily manipulate its direction.
5. Place the fan
While looking in a mirror, tilt your head back or lift your eyelid to expose your upper waterline. Gently place the fan on the underside of your natural lashes, as close to the waterline as possible, without touching it.
Note: Mastering placement requires tricks that are best explained visually. Make sure to check your welcome email or reach out to us via email or Instagram DM for a link to our application tutorial.
6. Secure the bond
Once you are happy with your placement, secure the bond by gently pushing each fan into the natural lash using your tweezers or fingers.
We ship worldwide via DHL Express Priority. Within Canada is provided by Canada Post and Purolator.
Free shipping in North America $200 and over.